
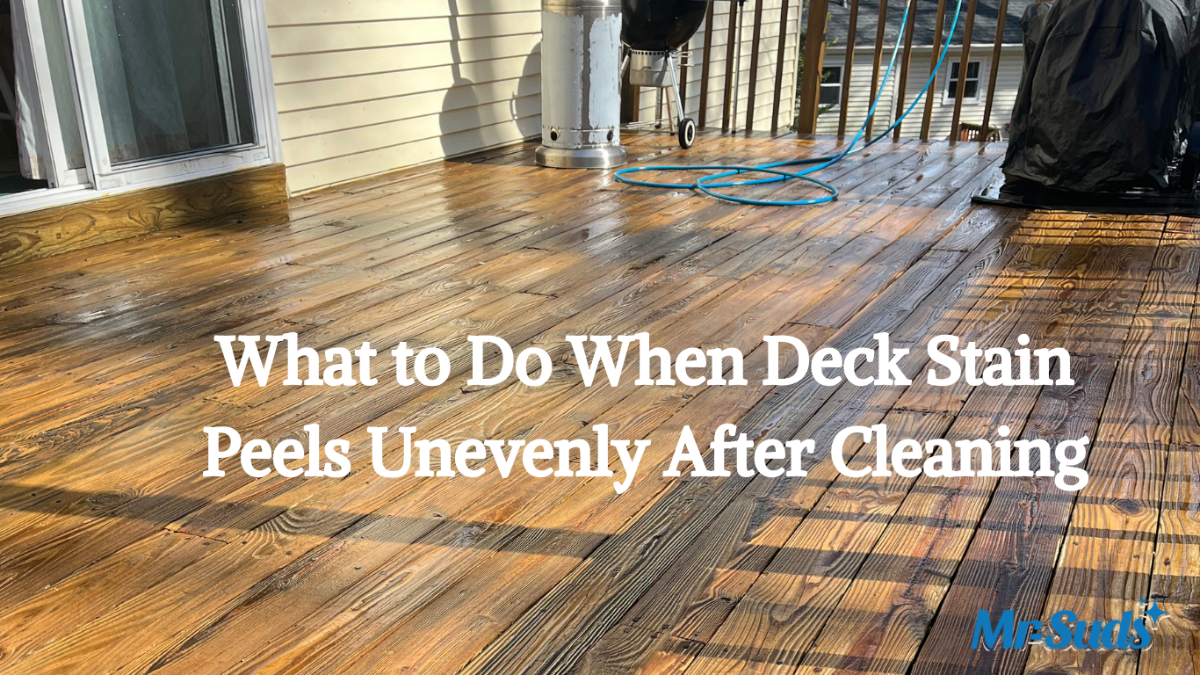
Pressure washing did not cause your deck stain to peel, it exposed peeling that had already started. Film forming stains, meaning solid and semi solid products, sit on top of the wood and lose adhesion over time. Washing removes the loose film. The real decision is strip and refinish, not spot touch up.
Read that twice if you need to, because the next hour of decisions depends on believing it. Then work through the failure map and the five options below, and you will know which one applies to your deck before anybody quotes you. If you would rather have someone else run this diagnosis for you, that is what deck cleaning and restoration is for.
First, You Did Not Ruin Your Deck
A bonded coating does not come off a deck under normal cleaning. It does not lift under a 25 degree tip at a sensible distance, and it does not peel because water touched it.
What came off your boards was film that had already released from the wood. It was sitting there held in place by friction, by the film around it, and by the fact that nothing had disturbed it yet.
The wash disturbed it. That is all it did.
A Newington cape, last June. Deck off the back slider, roughly twelve by sixteen, pressure treated, solid brown stain applied by the previous owner some years earlier.
The homeowner washed it on a warm Saturday with a consumer machine and a 25 degree tip at a reasonable distance. By the time he shut the machine off, about a third of the color was gone and wet strips of brown film were lying in the grass below the deck.
He called us on Monday convinced he had stripped his own deck.
Roman walked to the far corner, behind the grill, where the wand had never reached. He slid a putty knife under the edge of the remaining film and it came off dry, in one sheet about the size of a dinner plate.
That film was already off. The water just took the pieces that were loose.
If you want to run the same test on your own deck, it takes ten seconds and it is in the failure map section below.
This whole problem is specific to a coating that sits on top of wood, so it does not apply to a composite or PVC surface; if that is what you have, see PVC deck cleaning instead.
Why Film Forming Stain Peels and Penetrating Stain Does Not
The word “stain” covers two completely different products that fail in completely different ways. Almost every decision on this page comes back to which one you have.
What a Film Former Actually Does
Solid stains and semi solid stains sit on top of the wood and cure into a continuous skin. Think of them as thin paint that lets a little grain show through.
The bond is mechanical. The coating grips the surface texture of the board. It is not chemically married to the wood, it is holding on.
Mechanical bonds fail. Wood moves with moisture and temperature, the film moves differently, and eventually the grip lets go in patches. Then it flakes, curls at the edges and peels. University extension research into exterior coating failure on wood describes the same progression on painted surfaces: moisture blisters form first, then collapse, and the coating cracks and peels from there.
What a Penetrating Oil Does
A penetrating oil soaks into the wood fiber instead of sitting on it. There is no film on the surface to release.
So it does not peel. It wears. Traffic lanes lighten, sunny areas fade first, and the finish thins out gradually and evenly.
That difference matters enormously in maintenance terms. A worn penetrating finish gets cleaned and recoated. A failed film former has to be stripped off first.
Why Your Railings Still Look Fine
This is one of the most common questions we get, and the answer is a useful diagnostic.
Your railings are vertical. Water runs straight off them. They hold no snow, no puddles, and no standing meltwater. Sunlight hits them at an angle rather than square on for six hours a day.
The deck floor holds everything: rain, snow, melt, pollen, spilled drinks, a planter that never gets moved.
Same product, same day, same brush, and the film on a rail can outlive the film on the floor by several years. That is not a defect in the product. That is geometry.
The same thing shows up on stained fences, which is why fence cleaning rarely turns up the sheet peeling you see on a deck floor.
The Mechanism Nobody Explains: Moisture Coming Up From Below
Here is the part that changes how you look at your deck.
Wood is essentially a bundle of straws running the length of the board. Water moves along those straws readily, and it moves in from any unsealed face.
Now think about your deck boards. The top is sealed with stain. The edges got some. The underside got nothing at all, because almost nobody stains the bottom of a deck board and almost no builder back seals them before installation.
So the board has one sealed face and one wide open one, pointed at damp ground.
Ground moisture, rain splash and humidity wick up through the board and reach the underside of the film on top. The film will not let the moisture out. Pressure builds at that interface, and adhesion starts to let go from below rather than from above. The U.S. Forest Products Laboratory’s own finishing data backs this up directly: a coating measurably slows how fast moisture can leave the wood underneath it, which is exactly what traps water at that interface.
Then winter arrives, that trapped moisture freezes, and it expands. That is the pry bar. That is the pop.
Roman says the honest version of this on site: he would rather show somebody the underside of a board than explain it. Nobody seals the bottom, and that is where the water gets in.
Why Joist Tops Are the Worst Spot
Look at where a deck board sits on a joist. There is a contact line running the full width of the board where two pieces of wood press together.
Water gets into that line by capillary action and then has almost no way to evaporate out. No airflow, no sun, just a permanently damp seam.
So the wood directly above each joist stays wetter than the wood spanning between them, all year, every year.
The result: peeling that traces the joist layout in straight parallel lines, usually sixteen inches apart. If your failure pattern looks like somebody drew stripes across the deck with a ruler, you are looking at moisture from below and nothing else.
The Seven Reasons a Deck Stain Loses Adhesion
Most failed decks have two or three of these at once.
- It was a film former on a horizontal surface in a freeze thaw climate. The single biggest one. A product that works acceptably on siding or a fence in Connecticut is being asked to survive standing water, snow load and a hundred plus freeze cycles a year on a deck floor.
- Moisture from below with no back sealing. Covered above. Unsealed underside, sealed top, water with nowhere to go.
- An incompatible recoat. Oil over a water based product, water based over an oil, or a solid stain laid over a semi transparent that was never removed. The new coating bonds to the old film rather than the wood, and it is only as strong as whatever it is stuck to.
- Applied over a dirty, damp or mill glazed board. Mill glaze is the burnished, slightly shiny surface left by planer blades on new lumber. It closes the pores, and it is one of the most common reasons a brand new deck fails its first finish within a year. Stain applied over it never keys in.
- Applied to green pressure treated lumber. Treated lumber leaves the yard saturated with treatment solution. Coat it before it dries down and the finish traps that moisture inside the board. Plenty of decks were stained the same month they were built.
- Over applied and never fully cured. Too much product in one coat skins over on top while staying soft underneath. It stays slightly tacky, collects dirt, and never develops proper adhesion.
- UV breakdown on the south and west exposures. Ultraviolet light degrades the binder in the coating. The stair treads and the section that takes afternoon sun will always fail first, and they usually chalk to grey before they flake.
How to Read Your Deck’s Failure Map Before You Buy Anything
Fifteen minutes with a putty knife and a phone camera will tell you more than any product label. Do this before you spend a dollar.
Photograph the whole deck from above if you can, from an upstairs window. The pattern is much easier to read from height than from standing on it.
Note where the failure is. Floor only, or rails too? Does it follow straight lines sixteen inches apart? Is the south or west side worse? Is there a clean patch where a planter or a grill has been sitting?
Run the putty knife test. Pick an area that still looks intact, ideally somewhere the washer never reached. Slide a putty knife under an edge and push gently. If dry film lifts in a sheet, that film is already released and it is coming off eventually no matter what you do.
Do this in three or four places across the deck. If it lifts in most of them, you do not have a patch problem.
Run the water drop test. Put a few drops of water on the bare areas and on the areas that still hold color. If it soaks into the bare wood within seconds and beads on the coated wood, you have confirmed you are dealing with an intact film next to open wood, which is exactly why touch up will not blend.
Check the edges of the remaining film. Curled and lifting means active failure spreading outward. Chalky and powdery means UV degradation. Both need to come off.
Write down roughly what percentage of the deck has lost its coating. That number decides your options.
Your Five Real Options, With Honest Costs and Lifespans
Only one of these is usually right, and it is rarely the cheapest one. Here they are anyway, including the ones we would not do.
| Option | What it involves | Pros | Cons | Typical cost band | Realistic lifespan | Choose this if |
|---|---|---|---|---|---|---|
| Spot repair and touch up | Feather sand the bare areas, recoat with the same product | Cheapest, fastest, doable in a weekend | Color will not match, and the film around the patch is already releasing | Low | Often less than one season before it looks worse than now | Only if failure is under about 10 percent, isolated, and you are selling this year |
| Full strip, recoat with a film former | Chemical strip, neutralize, brighten, dry, reapply solid or semi solid | Uniform opaque look, hides old grey and damage | You have rebuilt the exact system that just failed | Medium to high | A few seasons on horizontal boards in this climate | Only if an HOA rule or matching an adjacent structure forces the opaque look |
| Full strip, switch to penetrating oil | Same prep work, different product class | Fails gracefully, recoats without stripping, no peeling ever again | Cannot hide grey or damage, less color opacity, needs lighter maintenance more often | Medium to high | Recoat cadence of a small number of years, with no strip required | The default recommendation for most Hartford County decks |
| Paint it | Strip, prime, paint with a porch and floor product | Strongest opacity and color choice | Same film problem with a harder skin, and considerably worse to remove later | High | Short on horizontal surfaces here | Rarely. Reasonable on stair risers and vertical faces only |
| Replace the decking | New boards on the existing frame if the frame is sound | Solves rot, cupping and splitting at the same time | Highest cost | Highest | Longest | Soft boards, cupping past correction, splitting around fasteners, or more than a handful of failing boards |
Here is the honest guidance, and it is the same thing we say standing on the deck.
On a horizontal pressure treated deck in central Connecticut, stripping and switching to a penetrating oil is the option that ends the cycle. Everything else either repeats the failure on a timer or costs considerably more. A full strip and refinish of this kind is exactly what our rejuvenation service covers.
The touch up option is on this list because it is legitimate in one narrow case, which is a house going on the market this season. It is not a repair. It is staging.
Roman’s line on this, and he says it every October: he will tell somebody to wait until next May before he will tell them to touch up bare spots in the fall.
If you want somebody to tell you which of the five applies to your specific deck, that is what the visit is for. Get a free quote or call (860) 263-9031.
The Correct Strip and Refinish Sequence
Nine steps. Doing them out of order is how people end up stripping twice.
Step 1: Pick the Right Stripper for the Coating You Have
Sodium hydroxide based strippers for solid stains and heavy film coatings. These are caustic, they carry a real burn and respiratory hazard if handled carelessly, and they demand respect and protection for anything growing nearby.
Sodium percarbonate for lighter, weathered or semi transparent coatings. Gentler, slower, safer around plantings.
Test a small area with whichever you think you need before you buy five gallons of it. If the film does not lift in the test patch, it will not lift on the deck.
Step 2: Dwell Without Drying
Stripper works while it is wet. The moment it flashes off in the sun, it stops working and starts becoming a residue you have to remove.
Work in the shade, work in sections you can actually keep an eye on, and mist it to keep it damp through the whole dwell. Dwell times vary widely by product and coating, from a handful of minutes to well over half an hour.
Step 3: Agitate
Stiff bristle brush, working along the grain, partway through the dwell.
Chemistry loosens the film. Agitation releases it. Skipping this step is the number one reason a DIY strip leaves film sitting down in the grain that you only notice after the new stain goes on.
Step 4: Rinse at Low Pressure
Wide fan tip, low pressure, consistent distance, moving with the grain.
Pressure here is for rinsing, not for cutting. Turn it up and you will fur the wood by eroding the soft spring growth out from between the harder bands, and now you have added a sanding job.
This is exactly the soft washing principle applied to wood: the chemistry does the work, the water only carries it away.
Step 5: Neutralize and Brighten With Oxalic Acid
Do not skip this. It is the difference between a good refinish and a blotchy one.
The stripper leaves the wood alkaline and darkened, sometimes noticeably brown or grey. Oxalic acid brightener drops the pH back into range, restores the natural color, lifts the black tannin and iron staining that forms around fasteners, and opens the fiber so the new product can absorb evenly.
Apply it while the deck is still damp from the rinse, let it work, then rinse again.
Step 6: Dry to a Target Moisture Content
Several dry days. A pinless moisture meter reading in the teens is what you want before any finish goes on.
In Hartford County humidity, “it looks dry” and “it is dry” are two different statements. A board can read fifteen percent on the sunny side of the deck and twenty two percent in the shaded corner on the same afternoon.
Step 7: Sand Only if It Is Furred
Light sanding on raised grain and splinter zones only. Sixty to eighty grit if the furring is significant, eighty to a hundred to finish.
Do not sand the whole deck smooth. Fine sanding burnishes softwood and closes the pores you just spent two steps opening.
Step 8: Test Absorption With a Water Drop
Put a few drops of water on three different areas of the deck, including one in the shade.
Soaks in within a few seconds, the wood is open and ready. Beads or sits, something is still closed, either residual film, mill glaze or trapped moisture. Find out which before you stain.
Step 9: Apply Thin, in the Right Window
Thin coats. Back brush everything you roll or spray so the product gets pushed into the wood rather than laid on top of it. Wipe any excess that has not absorbed within the product’s stated window.
Two thin passes beat one heavy one, always. Never chase deeper color by putting more product on, because anything the wood cannot absorb stays on the surface and goes tacky.
What a Stripped Deck Actually Looks Like Before You Stain
Worth setting expectations here, because the moment after stripping is when people panic.
A freshly stripped deck looks uneven. Not slightly. Genuinely patchy.
You will see ghosting where the old film held on longest, because that wood was protected while the exposed wood weathered. You will see darker rings and streaks around fasteners from iron tannin reactions. You will see boards that are simply different colors because they came from different trees.
The brightener fixes most of it. That step is genuinely dramatic, and it is why we never let a customer see the deck between the strip and the brightening if we can help it.
A penetrating oil evens out most of what is left, because it soaks in and the pigment carries across the variation.
And then some boards will still read slightly differently. That is wood. A deck is not a painted floor, and anybody promising you a perfectly uniform result after a strip is setting you up to be disappointed in July.
Connecticut Timing: The Part That Decides Whether Any of This Lasts
You can do every step above perfectly and still fail if the calendar is wrong.
Why Freeze Thaw Is Brutal on Film Formers Here
Central Connecticut delivers roughly 100 to 140 freeze thaw cycles a season on horizontal surfaces.
Every one of those cycles takes the moisture sitting under your film, freezes it, expands it, and thaws it. It is a small pry bar working under the coating a hundred plus times a winter.
A film former on a deck floor here is fighting a battle it eventually loses. That is not pessimism, it is the reason this article gets so many readers every June.
Snow Sitting on the Boards for Weeks
A vertical rail sheds snow the day it falls. A deck floor holds it.
Snow sits on horizontal boards for weeks at a time here, slowly melting from underneath and keeping the coating in contact with liquid water at near freezing temperatures for the entire duration.
That single difference explains most of why your rails look fine.
North Facing Decks That Never Fully Dry
Shade plus the mature oak and maple canopy over a lot of Newington and Wethersfield backyards means a north facing deck can stay damp through an entire week of dry weather.
Those decks need longer dry windows at every stage, and they are the strongest candidates for switching away from film formers entirely.
Pool surrounds are the extreme version of this. Constant splash-out, wet feet, and furniture sitting in the same spot all summer. If your deck is part of a pool area, the hard surfaces have the same problem, which is what pool deck cleaning deals with.
The Refinish Window Is Roughly Late May to September
Below about 40 to 45 degrees, strippers slow down, brighteners underperform and stains do not cure properly.
That is the plain version. April feels like it should work and does not, because nights are still cold and the wood is still carrying winter moisture.
Dew Point and the Same Day Recoat
A deck stained at four in the afternoon in September gets hit with condensation by ten that night.
That is a failed cure. The finish has not set, moisture lands on it, and you get a dull, tacky, blotchy surface that will not last a year.
Stop applying by early afternoon and let the finish have the warm part of the day. Check the overnight dew point, not just the daytime temperature.
Spring Pollen Contaminates a Prepped Surface
Heavy oak and pine pollen from late April into May settles onto freshly brightened, wide open, absorbent wood within hours.
Do not strip a deck and leave it bare for a week in May waiting for a free weekend. Sequence the whole job into one weather window or wait for the next one.
A Wethersfield Deck That Taught This Lesson
Backing onto mature oaks, north facing, built somewhere in the early 2000s. Solid stain over what turned out to be an older semi transparent oil, applied by somebody before the current owners bought the house.
The failure pattern told the whole story before we touched anything.
The peeling traced the joist lines almost exactly, straight parallel bands running across the deck sixteen inches apart. That says moisture from below, not weather from above.
The railings looked presentable. That says the product was never the problem on vertical surfaces.
And the south facing stair treads had chalked out to grey without much flaking at all. That says UV finished those off before moisture got the chance.
Three different failures on one deck, each one readable from where we were standing.
The honest conversation was short. Spot repair on that deck would have looked acceptable for about six weeks and would have been gone by the following spring, because the film adjacent to every bare patch was already releasing.
What we did: sodium hydroxide strip, worked in sections in the shade so nothing flashed off, full oxalic brightening, then four dry days in July. Then a penetrating oil applied thin in two passes, both finished by early afternoon so the dew point never caught the finish wet.
The honest outcome: the boards directly over the joists still read slightly darker than the ones spanning between them, and we told the homeowner that would be the case before we started. Wood that sat wet for years does not fully match wood that did not.
Two seasons later that deck needed a maintenance coat. Not a strip. That is the entire point of the switch.
When to Call Us Instead
Plenty of people handle this themselves and do it well. A small ground level deck, in July, with a free four day weather window, is a reasonable DIY project. It is also the same logic behind everything in our approach to pressure washing in Hartford CT: matching the method and the scale of the job to what the surface and the schedule actually allow.
Where it stops being one:
Large decks, where keeping stripper wet across the whole surface stops being possible with one person and a pump sprayer.
Second story decks, where everything you rinse lands on whatever is underneath.
A solid stain over an unknown previous coating, where you may need two different strippers.
Chemical stripping directly above planting beds or a lawn you care about. Caustic stripper plus no pre-wetting plus no neutralizing is how people kill a border.
You already tried once and the film did not lift.
If any of those apply, get a free quote before you buy chemicals.
Frequently Asked Questions
Why did my deck stain peel after pressure washing? Because the stain had already lost adhesion and the wash removed the loose film. A bonded coating does not release under normal cleaning pressure. Film forming stains sit on top of the wood and let go over time, usually starting from underneath as moisture wicks up through the board.
Can I just stain over the bare spots where it came off? You can, but it rarely holds up. The color will not match, and more importantly the film immediately around each bare patch is already releasing. Within a season the patch edges spread and the deck looks worse than it does now. It is staging, not repair.
Why is the stain peeling on the deck floor but still fine on the railings? Geometry. Rails shed water immediately, hold no snow, and take sunlight at an angle. The floor holds rain, meltwater and standing snow for weeks and takes direct overhead UV. The same product applied the same day commonly outlives its floor counterpart by several years on a rail.
Do I have to strip the entire deck or can I spot repair it? Run the putty knife test in three or four places. If dry film lifts in most of them, the coating is failing across the deck and spot repair will chase itself. Under roughly ten percent isolated failure is the only case where a patch makes sense.
What kind of stripper removes solid deck stain? Sodium hydroxide based strippers handle solid stains and heavy film coatings. Sodium percarbonate is the gentler choice for lighter or semi transparent finishes. Test a small area first. Whichever you use, keep it wet through the dwell, agitate along the grain, and neutralize afterward.
Do I need a wood brightener after stripping a deck? Yes. Stripper leaves the wood alkaline and darkened. Oxalic acid brightener restores the pH, brings back natural color, lifts tannin and iron staining around fasteners, and opens the fiber so the new finish absorbs evenly. Skipping it is the main cause of blotchy stain.
How long should a deck dry before staining in Connecticut? Several dry days, and longer for shaded or north facing decks. Target a moisture meter reading in the teens. Our humidity and tree canopy mean a deck that looks dry on the surface can still be well above twenty percent in the shaded corners.
Will my deck look uneven in color after stripping? Before brightening, yes, noticeably. Ghosting where the old film held, dark rings at fasteners, natural board to board variation. Brightener corrects most of it and a penetrating oil evens out much of the rest. Some boards will always read slightly differently, because it is wood.
Can I paint my deck instead of staining it? You can, and we generally advise against it on horizontal boards here. Paint is a film former with a harder skin, so it faces the same freeze thaw and moisture problem, and it is considerably harder to remove when it fails. It is a reasonable choice for stair risers and vertical faces.
When is the best time of year to refinish a deck in Connecticut? Roughly late May through September. Below 40 to 45 degrees, strippers, brighteners and stains all underperform. Finish applying by early afternoon so the overnight dew point does not catch a wet finish, and avoid leaving a stripped deck bare through May pollen.
Get a Straight Read on Your Deck
If half your color came off on Saturday, the useful next step is not a trip to the store. It is finding out how much of the remaining film is actually still attached.
We will run the putty knife test with you, read the failure pattern, and tell you which of the five options fits your deck. Sometimes that answer is a full strip and a switch to penetrating oil. Sometimes it is that you should wait until next May and do it properly rather than rush a bad job in October. We will say that too.
We serve Newington, Wethersfield, Rocky Hill, Glastonbury, West Hartford, Berlin, Farmington and the surrounding Hartford County towns, Monday to Friday, 8am to 4pm. Deck work runs roughly late May through September here.
Book deck cleaning and restoration, or get a free quote and send a photo of the deck taken from an upstairs window if you can, because the pattern reads better from above.
Mr-Suds Washing, Newington, CT. Licensed, bonded and insured. Call (860) 263-9031.