
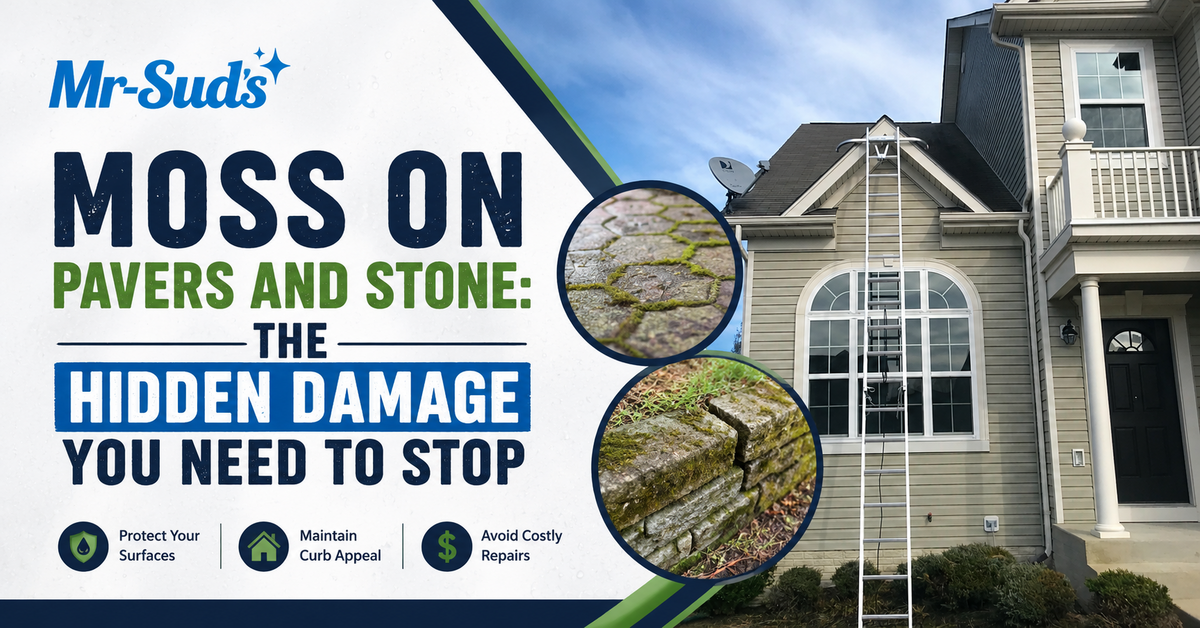
A homeowner in Wethersfield called us about their paver patio last spring. They had it installed eight years ago and it looked beautiful for the first few. Then moss started filling the joints. At first, they liked it. It had that old-world European courtyard look.
Five years later, that charming moss had become a real problem. Three sections of the patio were uneven enough to catch a shoe and trip on. Several pavers rocked when you stepped on them. The entire surface was slippery after any rain.
When I inspected the patio, the issue was obvious. The polymeric sand between the joints was almost completely gone. The moss roots had displaced it over years. That moss held moisture in the joints through every winter, and 80 to 100 freeze-thaw cycles per season pushed the pavers apart a little more each year. What started as a cosmetic detail had become a safety hazard and a structural problem that now required lifting, re-grading, re-sanding, and resetting half the patio.
This is what happens when moss goes unchecked on hardscape surfaces in Connecticut.
Moss on pavers and stone causes hidden damage by trapping moisture in joints and on surfaces, displacing joint sand, creating uneven and shifting pavers, and accelerating freeze-thaw deterioration in Connecticut’s climate. It also creates a significant slip-and-fall hazard when wet. Professional paver cleaning followed by re-sanding with polymeric sand and sealing is the most effective way to remove moss and prevent long-term damage.
Why Moss on Pavers Is Not Just a Cosmetic Problem
Moss Displaces Joint Sand and Destabilizes Your Hardscape
Pavers are not cemented in place. They are held stable by two things: compacted base material underneath and joint sand (or polymeric sand) between them. That joint material is what keeps each paver locked against its neighbors.
Moss roots penetrate into the joint material. Slowly, over months and years, those roots break the sand apart and push it out of the joint. As the sand disappears, pavers lose their lateral stability. They begin to shift, rock, and settle unevenly.
When I press down on a paver in a mossy patio and it rocks, I know the joint sand is gone. The moss displaced it. That is usually the moment the homeowner realizes this is not just green fuzz.
Once enough joint sand is lost, individual pavers can lift on one side, sink on another, or separate from their neighbors entirely. These gaps create trip hazards, collect more water, and allow even more moss to colonize. The damage feeds itself.
Moss Traps Moisture That Feeds Freeze-Thaw Damage
Moss acts as a sponge on the surface and inside the joints. It holds water against the paver material and keeps the joints saturated long after the rain stops.
In Connecticut, where freeze-thaw cycles repeat 80 to 100 or more times per winter, that trapped moisture is the primary driver of joint erosion, paver heaving, and surface spalling. A moss-free joint drains and dries between rain events. A moss-filled joint stays wet indefinitely, providing water for every single freeze-thaw cycle.
Each cycle widens the gaps a fraction further. More space means more moss. More moss means more moisture. More moisture means more freeze-thaw damage. It is a self-reinforcing cycle that accelerates every winter.
Moss Creates a Real Slip-and-Fall Hazard
Wet moss is extremely slippery. On smooth pavers, bluestone, or flagstone, a mossy surface after rain becomes genuinely dangerous to walk on.
Paver patios and walkways are high-traffic areas. Children run across them. Elderly family members walk on them carefully. Guests carrying plates and drinks at a backyard gathering do not expect the ground to be slick.
One slip on a mossy paver can result in a serious injury. And homeowners can be held liable for injuries to guests on their property caused by unmaintained surfaces. This is not just a maintenance decision. It is a safety and liability issue.
Moss Accelerates Surface Deterioration
On porous materials like brick pavers, concrete pavers, and natural stone, moss holds moisture against the surface continuously. Not just in the joints, but across the face of the paver itself.
This constant dampness accelerates weathering, erosion, and color loss. On brick pavers, moss-held moisture leads to the same spalling and flaking that freeze-thaw causes on walls and steps. On natural stone like bluestone, flagstone, and brownstone, moss can etch the surface and leave permanent staining that remains visible even after the moss is removed.
How Moss Gets Established on Your Pavers (and Why It Spreads)
The Conditions Moss Needs
Moss is not random. It grows where conditions are right, and Connecticut provides those conditions on a large percentage of residential hardscapes.
Shade is the primary factor. Moss thrives in areas with limited direct sunlight. Patios under trees, north-facing walkways, and areas shaded by the house, garage, or fences are the most vulnerable spots.
Moisture is the fuel. Consistent dampness from rain, poor drainage, sprinkler overspray, or gutter overflow keeps the surface hospitable. Connecticut’s 118 precipitation days per year ensure that paver surfaces in shaded areas stay damp enough for moss to establish during most of the growing season.
Organic nutrients provide the food source. Dust, pollen, decomposing leaf fragments, and dirt that settle into paver joints feed moss growth. A joint that collects organic debris becomes a planting bed.
Eroded joint material provides the opportunity. Once joint sand starts to erode from rain, foot traffic, or age, the empty gaps become open invitations for moss spores to move in.
Why Moss Spreads Faster Than You Expect
Moss reproduces through spores that travel by wind, water, and foot traffic. Once a colony establishes in one joint, spores travel to adjacent joints during the next rain event. In Connecticut’s humid summers, new colonies can establish in neighboring joints within weeks.
Here is a detail that catches most homeowners off guard. Pressure washing moss without chemical pre-treatment can actually fragment the moss and spread spores across the entire surface, causing faster and wider regrowth than if you had done nothing. We get calls every spring from homeowners who pressure washed their pavers the previous fall and are now dealing with worse moss coverage than before. The washing blasted out the last of the joint sand and scattered live moss fragments everywhere.
Killing the moss before removing it is essential. More on that in the removal section.
The Surfaces Most Vulnerable in Hartford County
Brick pavers are the most common paver type in Hartford County residential patios and walkways. Their porous surface absorbs and retains moisture, making them highly susceptible to moss colonization.
Concrete pavers are less porous than brick but still vulnerable, especially in shaded, damp locations where moisture sits on the surface.
Bluestone is common in older Wethersfield, Glastonbury, and Avon properties. It is a natural stone with a textured surface that gives moss excellent grip. Bluestone also absorbs moisture, which makes it particularly vulnerable to freeze-thaw damage when moss holds water against it.
Flagstone has irregular shapes with wide, uneven joints that naturally collect organic debris and moisture. These joints are ideal colonization sites for moss, especially in shaded garden paths and patios.
Stone retaining walls are often overlooked. The horizontal ledges and mortar joints on retaining walls trap water and organic material, creating conditions where moss establishes and then holds moisture against the stone face all winter.
How to Remove Moss From Pavers and Stone Safely
The removal process matters as much as the result. Done wrong, you make the problem worse. Done right, the pavers stay clean for years.
Step 1: Kill the Moss Before You Remove It
Apply a moss-killing solution to the entire affected area before any scrubbing or pressure washing begins. A 1:1 bleach and water solution works well. Paver-safe commercial moss killers are also effective.
One critical warning: do NOT use iron-based moss killers (products like Moss B Ware or anything containing ferrous sulfate) on pavers. Iron oxide reacts with the paver surface and creates permanent orange-brown staining that is worse than the moss itself.
Allow the solution to dwell for 15 to 30 minutes to kill the moss at its root system. Killing first is essential because it prevents live moss fragments from spreading spores during the removal process.
Step 2: Pressure Wash at the Right PSI
Use 1,500 to 2,000 PSI for pavers. This is lower than what you would use on a concrete driveway. Higher pressure can dislodge pavers from their base, blast out remaining joint sand, and damage the paver surface itself.
Use a 25-degree (green) or 40-degree (white) nozzle. A surface cleaner attachment works well on flat paver surfaces, providing even coverage without the streaking that a standard wand can leave.
Direct the spray pattern away from joints where possible to preserve whatever sand remains. For natural stone like bluestone and flagstone, stay at the lower end of the range, around 1,500 PSI, to avoid etching the surface.
Step 3: Re-Sand the Joints with Polymeric Sand
This is the step that separates a lasting repair from a temporary rinse. It is also the step most DIY attempts skip entirely.
Polymeric sand is a specially formulated jointing material that hardens when activated with water. It creates a solid barrier in the joints that prevents moss, weeds, and insects from colonizing. It also stabilizes pavers against shifting and settling.
The application process is straightforward but must be done correctly. Joints need to be clean and dry before the sand goes in. Sweep polymeric sand into all joints, tamp or vibrate to settle the sand fully, then mist with water to activate the binding agent.
Without this step, moss returns within months because the empty joints are immediately available for recolonization. With polymeric sand, you are sealing the front door that moss uses to get in.
Step 4: Seal the Pavers (Recommended)
After cleaning and re-sanding, applying a paver sealer adds a moisture-resistant barrier to the surface. Sealing reduces moisture absorption, which slows algae and moss regrowth and provides additional freeze-thaw protection.
Paver sealers come in two finishes: matte (natural look) and wet-look (glossy finish that enhances color). Choose based on your preference for appearance.
Sealing also protects against UV fading, which keeps pavers looking vibrant longer. Plan to re-seal every 2 to 3 years for ongoing protection. For surfaces that need deeper restoration, our rejuvenation service combines cleaning, repair, and surface restoration.
The Professional Paver Restoration Process (What Mr-Suds Does Differently)
Why DIY Moss Removal Often Fails
The pattern is predictable. The homeowner scrubs or pressure washes the surface moss away. The patio looks great for a few weeks. Then the moss comes back, sometimes worse than before.
There are three reasons this happens. First, DIY cleaning removes the visible moss but does not kill the root system, so regrowth begins immediately. Second, high-pressure DIY washing blasts out whatever joint sand remained, opening wider gaps for new colonization. Third, homeowners almost never re-sand with polymeric sand because they do not know about it or do not know how to apply it properly.
The result is a patio that looks clean temporarily but is structurally worse than before the cleaning.
The Full Professional Process
Here is what a full paver restoration looks like when our crew handles it.
Inspect. Walk the entire hardscape to assess moss coverage, joint condition, paver stability, and drainage issues. Note any pavers that have shifted, sunk, or lifted.
Pre-treat. Apply professional-grade moss and algae treatment to kill all biological growth at the root level before any mechanical removal.
Pressure wash. Clean the entire surface at paver-safe PSI (1,500 to 2,000) with the appropriate nozzle and surface cleaner attachment.
Clear and dry joints. Remove all old, degraded joint material from between the pavers. Allow joints to dry completely before the next step.
Re-sand with polymeric sand. Sweep new polymeric sand into every joint, compact it, and activate with water according to the product specifications.
Seal. Apply a penetrating or film-forming paver sealer based on the homeowner’s preference for finish and appearance.
Final inspection. Walk the surface to confirm all joints are filled, the surface is clean, and no moss or debris remains.
How Long Professional Results Last
With polymeric sand and sealer applied, results typically last 2 to 3 years before significant moss regrowth in Hartford County conditions.
Without sealer but with polymeric sand, expect 12 to 18 months in heavily shaded areas and longer in areas with some sun exposure.
Without re-sanding, moss typically returns within 3 to 6 months because the empty joints are immediately vulnerable.
Annual light cleaning and inspection extends the interval between full restoration jobs. Catching a few gaps in the polymeric sand early and topping them up prevents the need for a complete redo.
How to Prevent Moss From Growing Back
Improve Drainage Around the Paver Area
Ensure the paver surface has a slight slope, around 1 to 2% grade, directing water away from the home and off the patio. Fix any low spots where water pools after rain.
Redirect downspouts and gutter runoff away from paver surfaces. Water draining from a downspout directly onto a patio edge feeds the exact conditions moss needs.
Check irrigation systems. Sprinkler heads that spray onto pavers deliver moisture to the surface on a daily schedule, which accelerates moss establishment.
Increase Sunlight and Airflow
Trim tree branches overhanging the paver area to increase direct sun exposure. Even a few additional hours of sunlight per day significantly slows moss growth by drying the surface faster between rain events.
Move or rotate planters, furniture, and storage items that sit in the same spot permanently. Anything pressed against the surface blocks airflow and creates damp, shaded pockets where moss thrives.
Keep the Surface Clean
Sweep pavers monthly during the growing season to remove organic debris, leaf fragments, and pollen that settle into joints and feed moss.
Remove fallen leaves promptly in autumn. Leaves that sit on pavers through fall rains decompose in the joints and create nutrient-rich conditions that moss exploits the following spring.
Schedule professional patio and paver cleaning annually or every 18 months to maintain joint integrity and surface condition before small problems become big ones.
Maintain Polymeric Sand and Sealer
Inspect joints annually for erosion or gaps. Top up polymeric sand in any areas where it has washed out or cracked. This takes minutes and prevents months of regrowth.
Re-seal every 2 to 3 years as the sealer manufacturer recommends. Sealed surfaces repel moisture and dry faster, which removes the conditions moss depends on.
What Professional Paver Cleaning and Restoration Costs in Connecticut
Cleaning Only (Moss Removal and Pressure Wash)
| Scope | Cost Estimate |
| Per square foot | $2 to $4 |
| Typical 300 sq ft patio | $600 to $1,200 |
| 100 sq ft walkway | $200 to $400 |
Full Restoration (Clean, Re-Sand, and Seal)
| Scope | Cost Estimate |
| Per square foot | $4 to $8 |
| Typical 300 sq ft patio | $1,200 to $2,400 |
The Cost of Doing Nothing
| Repair Type | Cost Estimate |
| Paver re-installation (lift, re-grade, re-sand, reset, seal) | $15 to $30+ per sq ft |
| 300 sq ft patio full reinstall | $4,500 to $9,000+ |
The comparison is clear. Annual professional maintenance at $600 to $1,200 prevents a $4,500 to $9,000 reinstallation that becomes necessary after years of unchecked moss and freeze-thaw damage. A full restoration at $1,200 to $2,400 with polymeric sand and sealer buys 2 to 3 years of protection and stability.
The Wethersfield homeowner whose patio I described at the beginning of this post spent nearly $5,000 to have half their patio lifted and reset. Annual cleaning would have prevented the entire problem for a fraction of that cost.
Frequently Asked Questions
Does moss actually damage pavers?
Yes. Moss displaces the joint sand that holds pavers in alignment, causing shifting, rocking, and uneven surfaces over time. It traps moisture in the joints that drives freeze-thaw damage during Connecticut winters. And wet moss creates a significant slip-and-fall hazard. Left untreated for several years, the combined damage can require full paver re-installation.
Can I pressure wash moss off pavers myself?
You can, but keep PSI at 1,500 to 2,000 to avoid dislodging pavers or blasting out remaining joint sand. Kill the moss with a bleach solution before washing to prevent spreading live spores. The bigger issue is what happens after the washing: if you do not re-sand with polymeric sand, the cleaned joints will be recolonized by moss within months.
What is polymeric sand and why does it matter?
Polymeric sand is a specially formulated jointing material that hardens when activated with water. It creates a solid barrier between pavers that prevents moss, weeds, and insects from colonizing the joints. It also stabilizes pavers against shifting and settling. Applying polymeric sand after cleaning is the single most important step in preventing moss regrowth.
How often should pavers be professionally cleaned in Connecticut?
Most paver patios and walkways in Hartford County benefit from professional cleaning every 12 to 24 months depending on shade, tree coverage, and moisture conditions. Full restoration with cleaning, re-sanding, and sealing is typically needed every 2 to 3 years in shaded areas.
Should I seal my pavers after cleaning?
Yes, especially in Connecticut where freeze-thaw is a major factor. Sealing creates a moisture-resistant barrier that slows moss and algae regrowth and protects against freeze-thaw surface damage. It also enhances paver color and makes future cleaning easier and faster. Plan to re-seal every 2 to 3 years.
Is moss on a stone retaining wall a problem?
Yes. Moss on retaining walls traps moisture against the stone and mortar joints. In Connecticut’s freeze-thaw climate, that trapped moisture causes mortar erosion and stone surface spalling over multiple winters. Regular cleaning and inspection prevents small maintenance items from becoming structural failures that require masonry repair.
Stop the Moss Before It Stops Your Patio
Moss on pavers may look harmless. Some homeowners even find it attractive. But it is actively undermining the structural integrity of your hardscape every day it sits there. It displaces the sand that holds your pavers in place. It traps the moisture that drives freeze-thaw damage. And it creates surfaces that are genuinely dangerous when wet.
The longer moss grows unchecked, the more expensive the eventual repair. Annual professional cleaning with proper re-sanding and sealing keeps your patio, walkway, and driveway stable, safe, and looking the way it did when it was installed.
Have moss taking over your pavers? Call Mr-Suds at (860) 263-9031 or request a free quote. We will clean, re-sand, and seal your hardscape so it lasts.